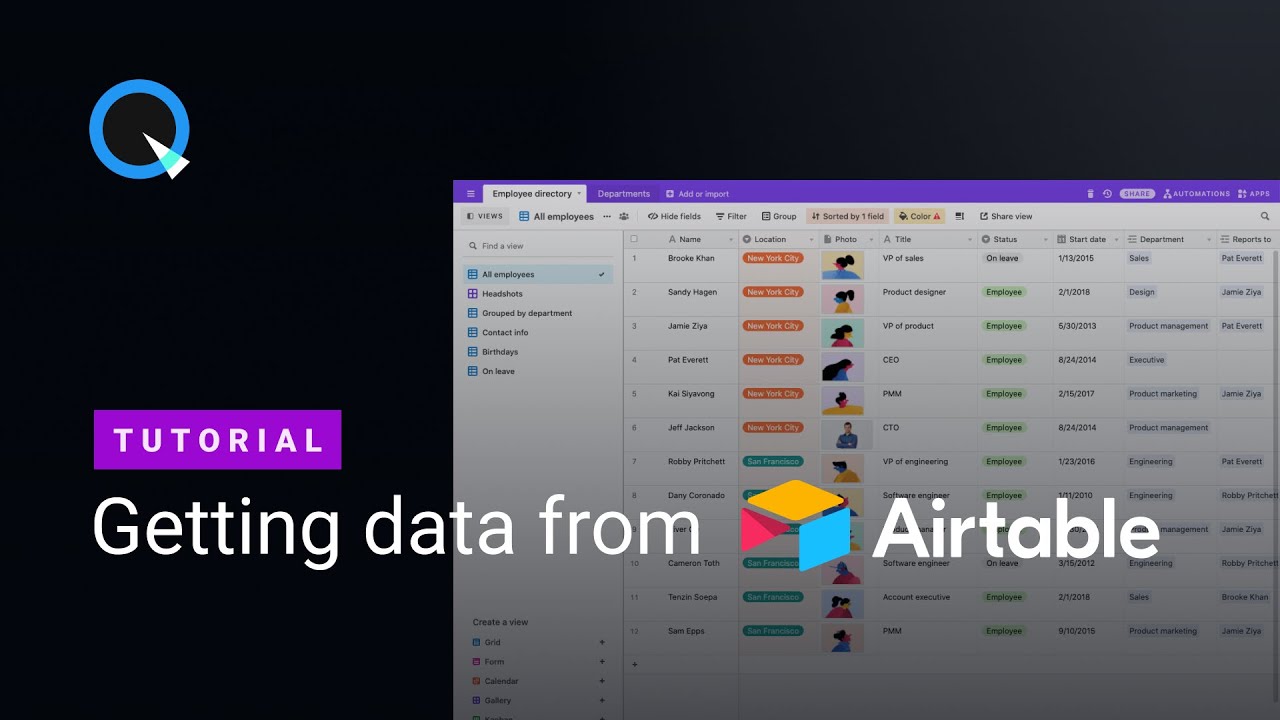
¿Has oído hablar de una herramienta como Airtable, pero no sabías por dónde empezar? ¡Entonces te invitamos al mundo de la programación visual de construir una base de datos!
Con este post comenzamos una serie de tutoriales en los que daremos ejemplos prácticos de cómo trabajar con nuestra herramienta Quarkly. En este tutorial, haremos una aplicación web sencilla que mostrará a los empleados de la empresa. Al crear la aplicación, ni un solo empleado de Russian Railways resultó herido.
El frente se realizará con Quarkly y los datos se extraerán de la base de datos a Airtable. En la salida, obtenemos una aplicación de reacción sincronizada con la base de datos.
Preámbulo. Por qué Airtable
Airtable es una popular herramienta sin código donde puede ampliar sus bases de datos. Parecen tablas, pero tienen una funcionalidad mucho más poderosa. En particular, para nuestra lección, se eligió Airtable debido a la forma fácil de transferir datos a través de la API.
Si es la primera vez que oye hablar de Airtable, antes de empezar a trabajar no será superfluo leer el manual oficial en la web de la empresa. También le recomendamos que no dude y haga preguntas en el telegrama de Airtable Chat & Community .
La parte frontal del trabajo se realizará en Quarkly, y para ello utilizaremos solo dos componentes:
- Tarjeta de empleado . Contendrá una foto, datos de texto y dos botones: enviar un correo electrónico y llamar. La tarjeta recibirá estos datos del componente principal: el contenedor.
- Envoltorio . Recibirá datos de Airtable, generará tarjetas y les transferirá datos.
Para los que no tienen tiempo de ahondar en el post en formato impreso, hemos preparado un vídeo con subtítulos y códigos de tiempo:
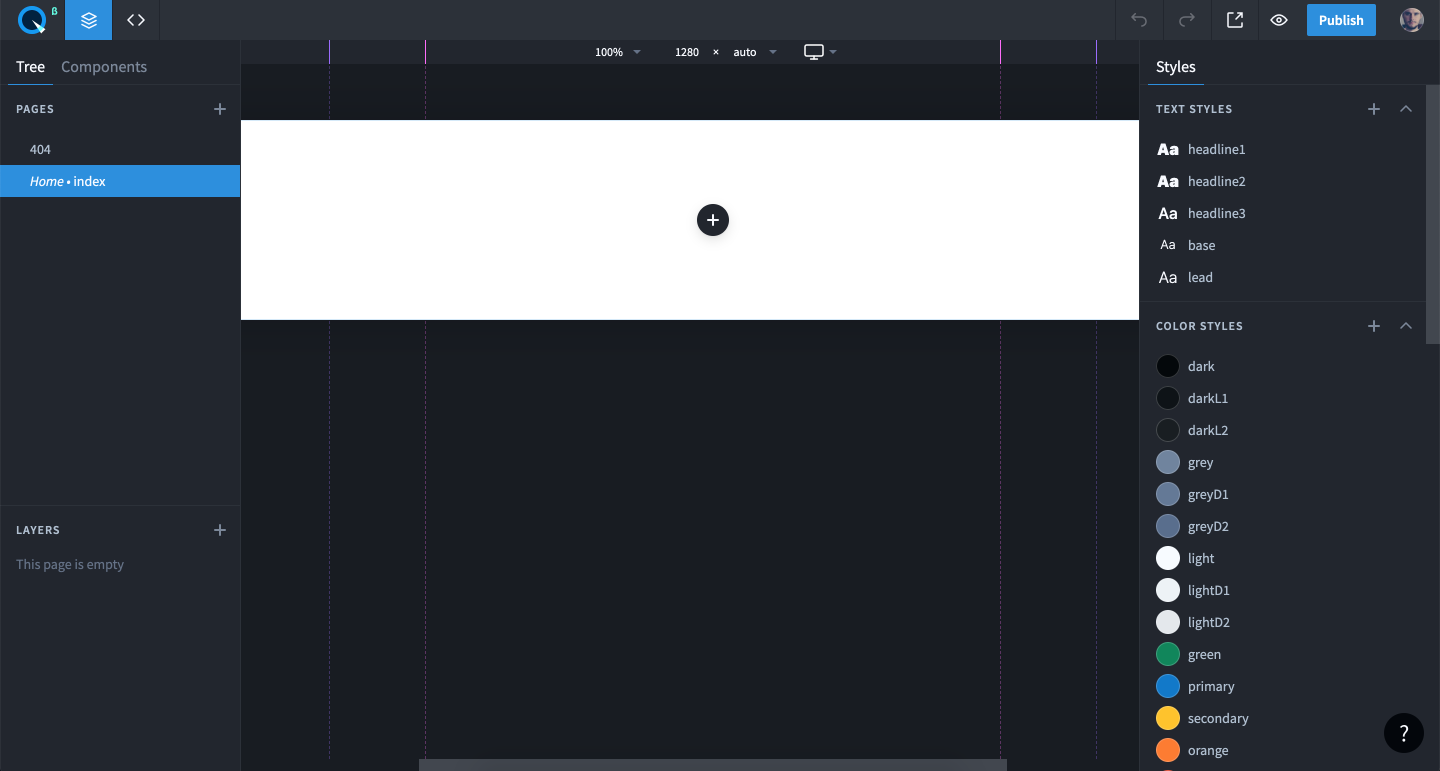
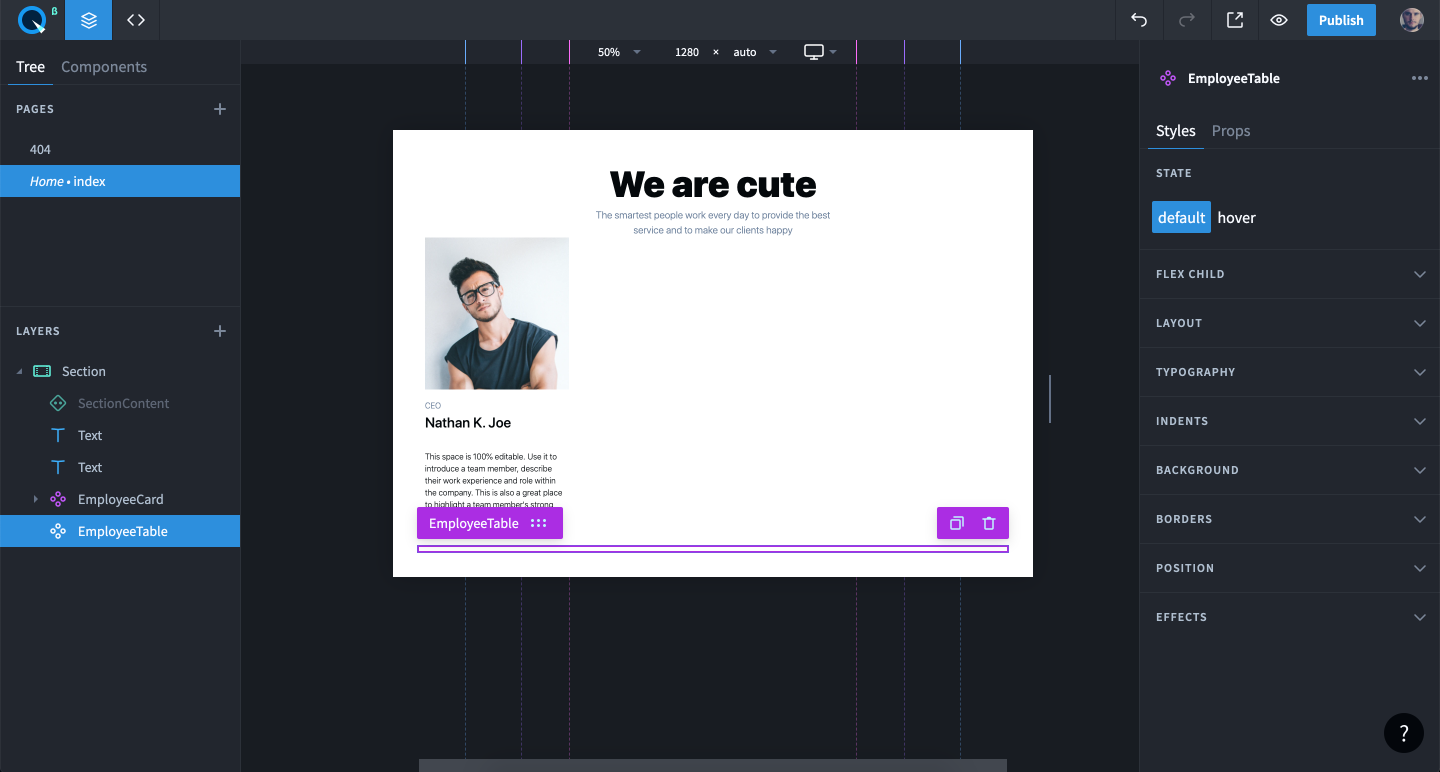
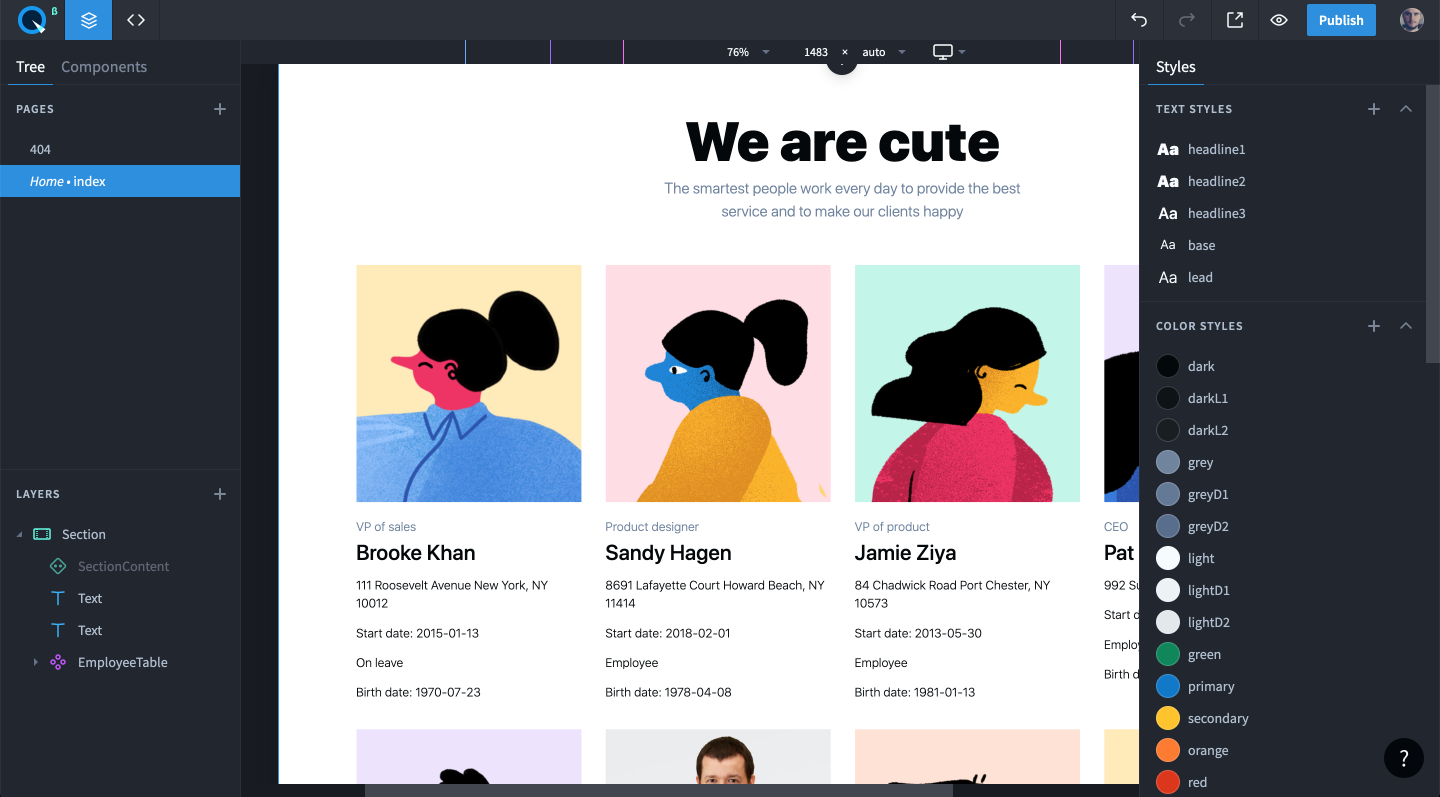
Parte 1. Creación de elementos visuales en Quarkly
Creación de tarjetas:
- Quarkly, Airtable Example;
- ;
- . + Team;
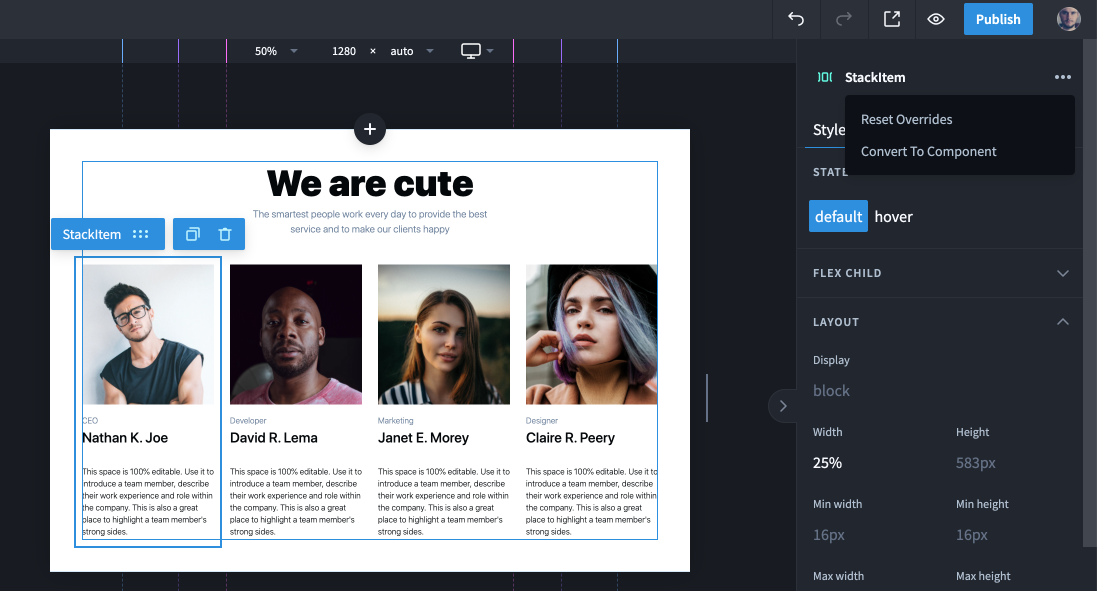
- (StackItem) ;
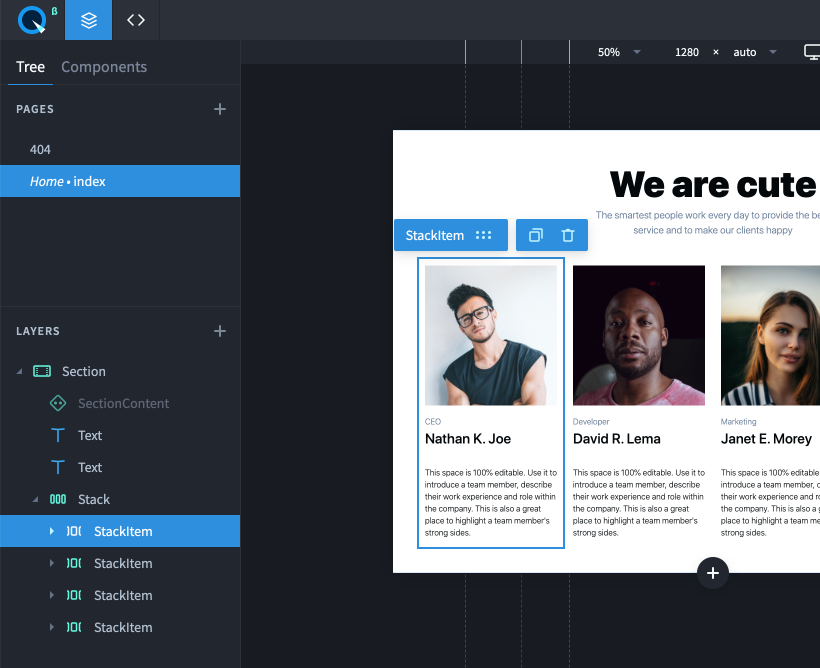
«» Convert to Component. EmployeeCard.
- react-, -.
:
- . , ;
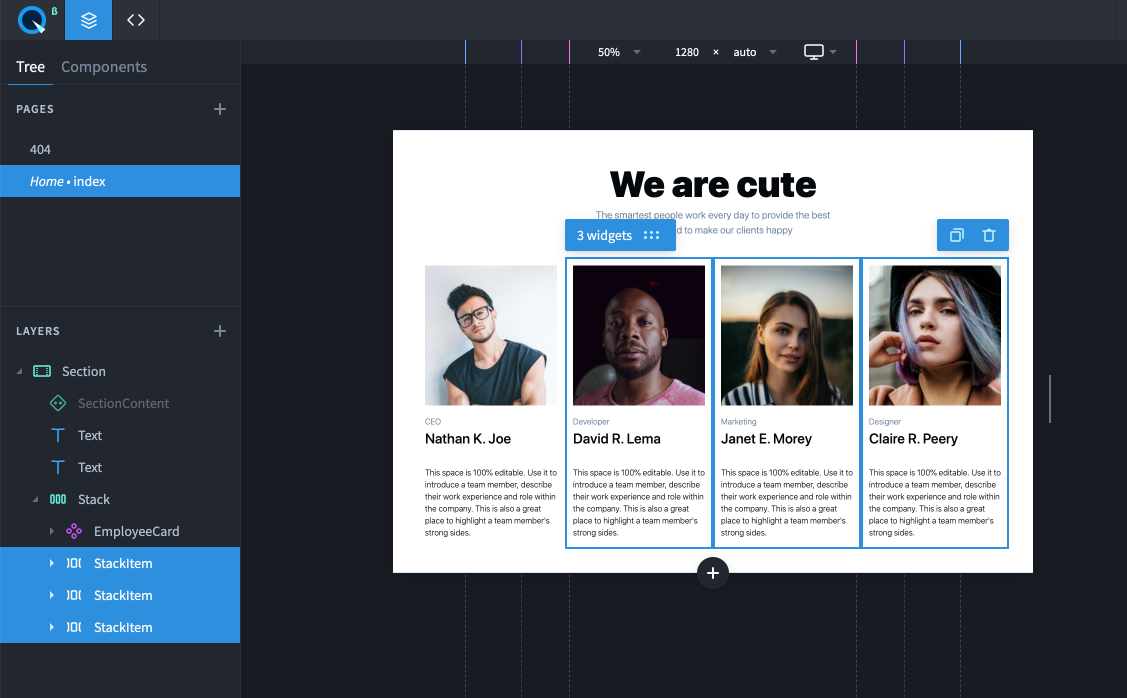
- EmployeeCard Stack. Stack , EmployeeCard: , «» Convert to Component. EmployeeTable.

, . Airtable.
2. Airtable
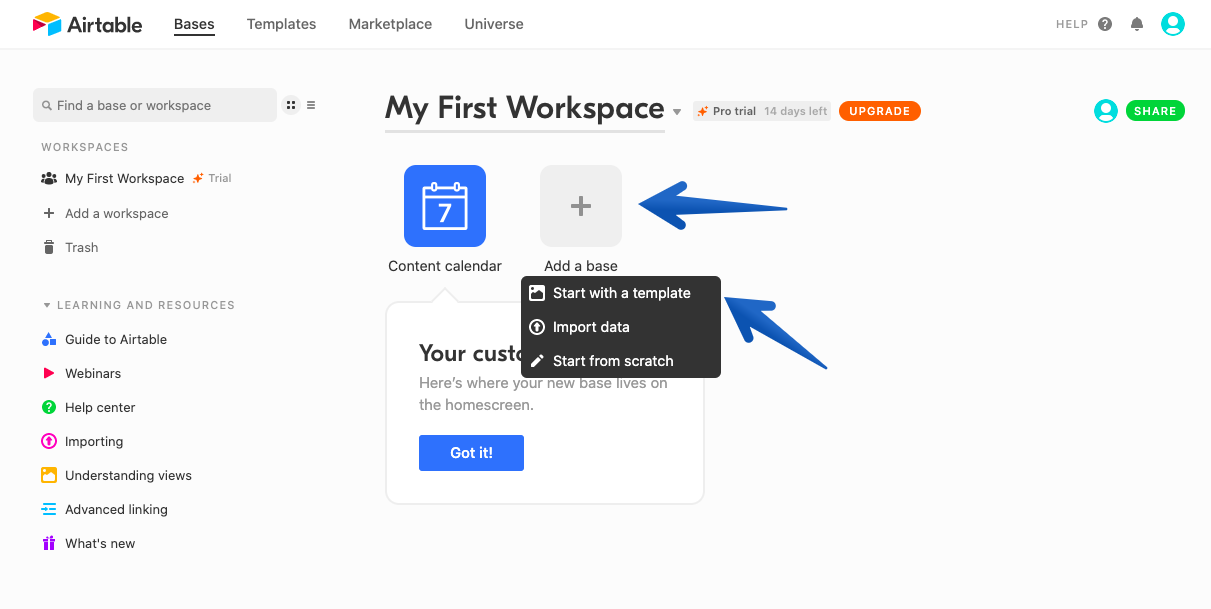
Airtable /.
- Add a base, . Start with a template;
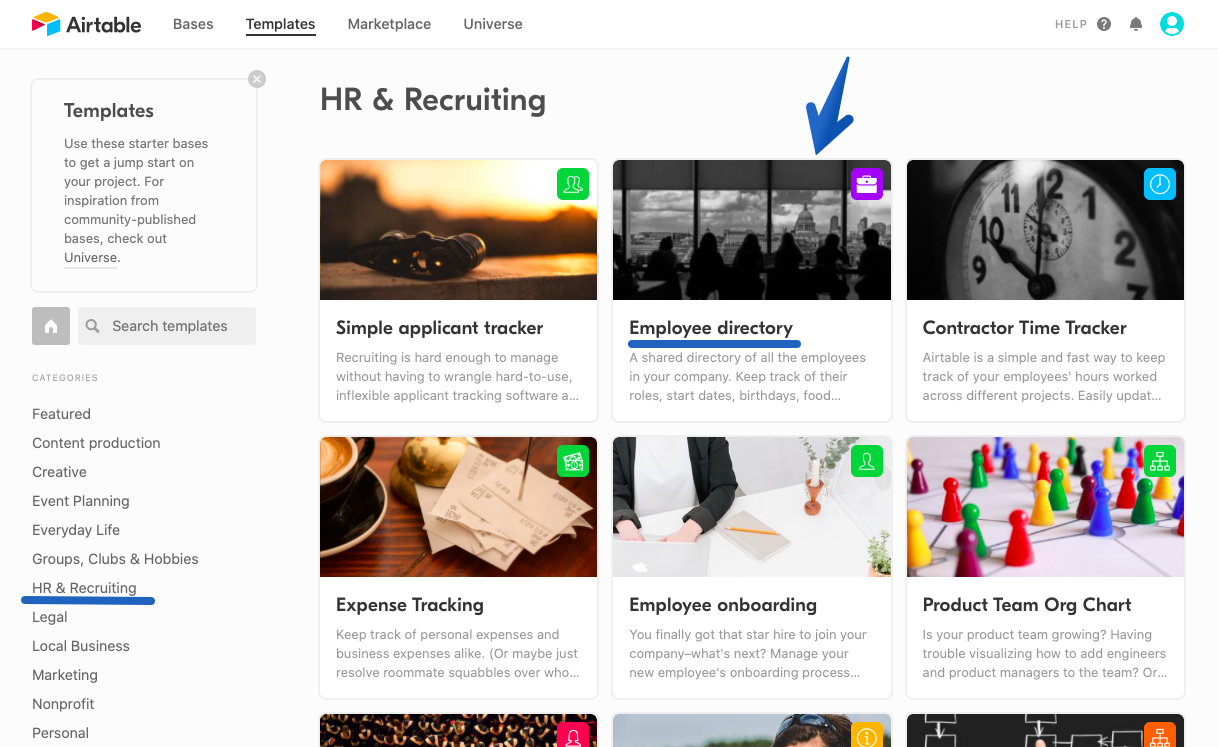
- HR & Recruiting Employee directory. Use template;
- ;
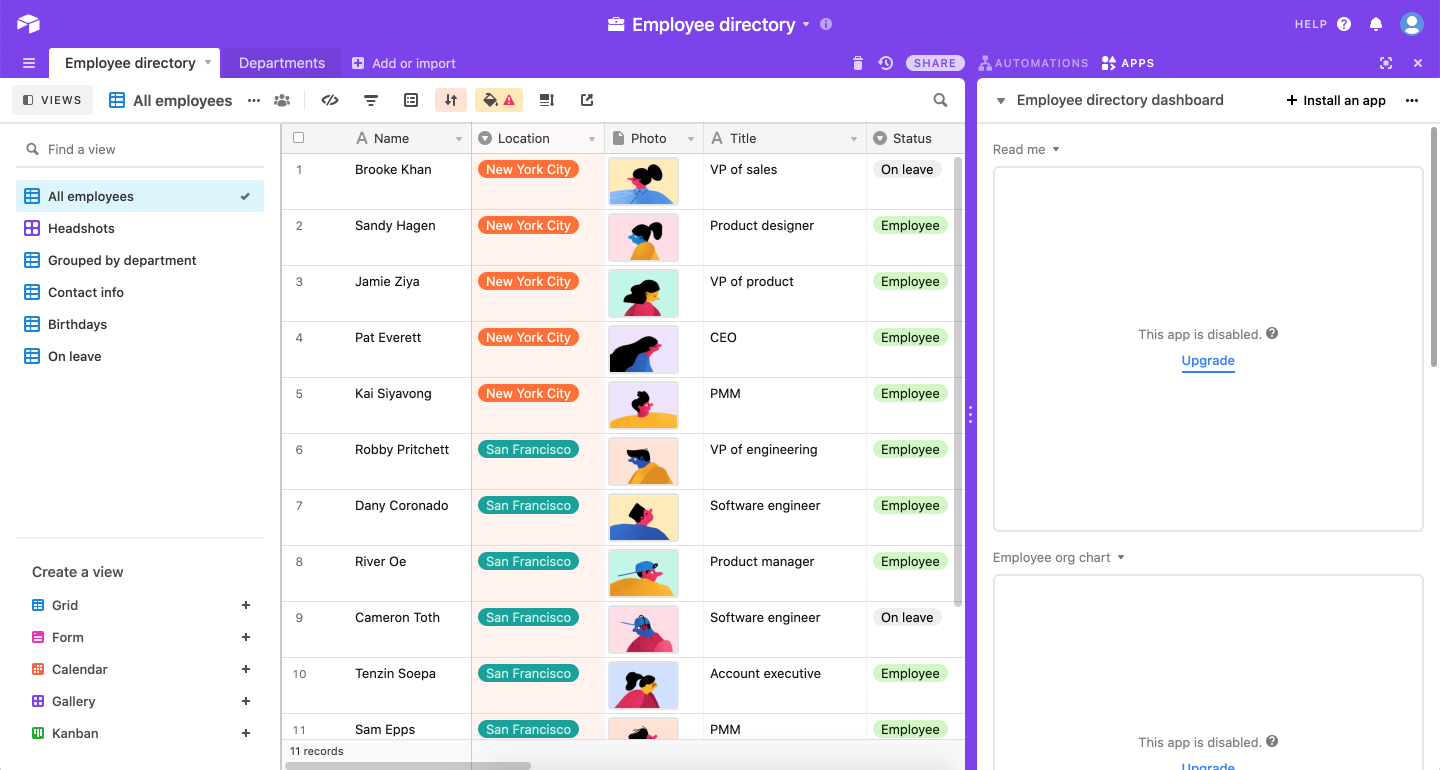
, .
3. API
Airtable API. , , Airtable .
- API : https://airtable.com/api

- Employee directory. AUTHENTICATION.
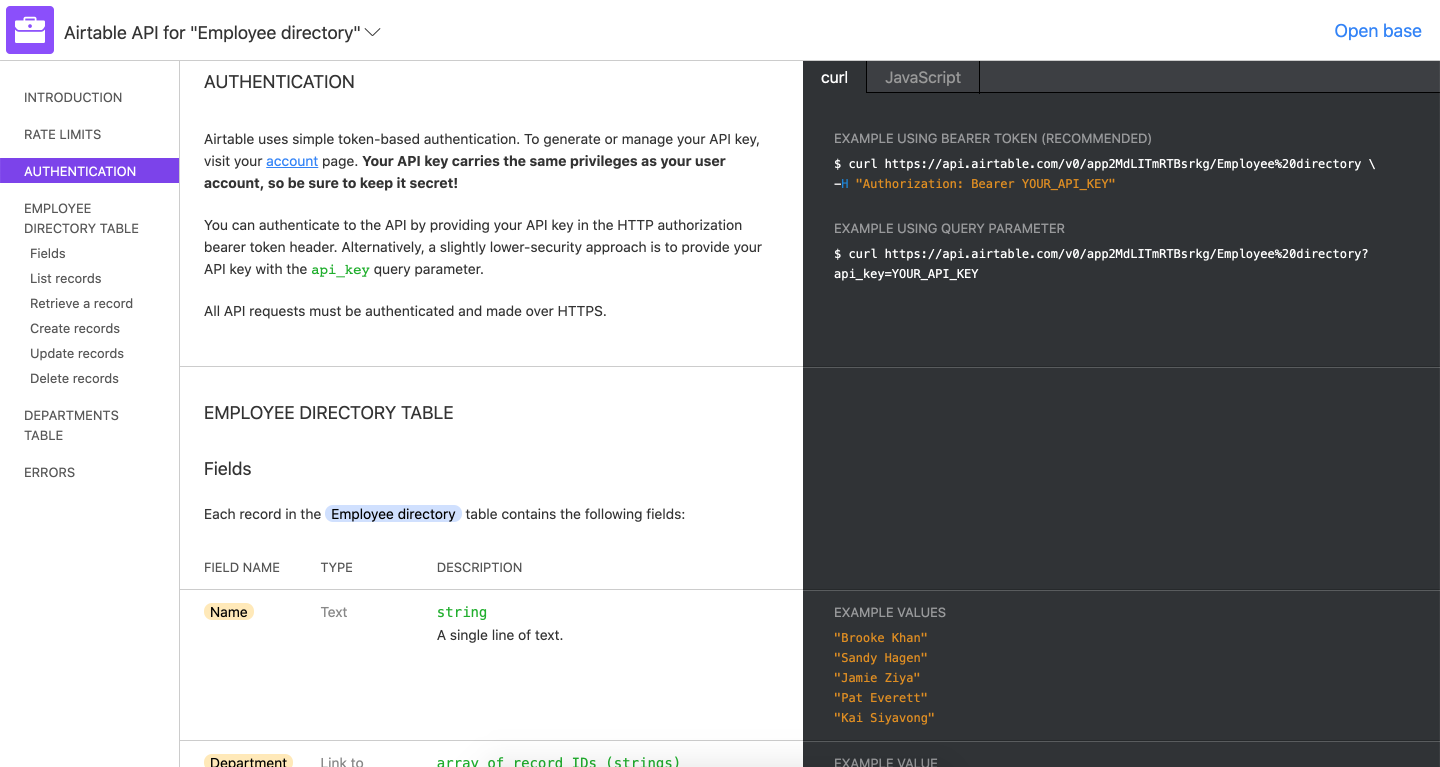
- , EXAMPLE USING BEARER TOKEN (RECOMMENDED).
:
$ curl https://api.airtable.com/v0/app2MdLITmRTBsrkg/Employee%20directory \
-H "Authorization: Bearer YOUR_API_KEY"
- YOUR_API_KEY. , . .

- API Generate API key;

- . 3. .
4. Airtable Quarkly
EmployeeTable , API.
- . Components <> EmployeeTable ( );
- :

- :
import React from "react";
:
import React, { useEffect, useState } from "react";
useEffect useState, ; - , EmployeeCard:
import EmployeeCard from "./EmployeeCard";
- children ( ) override (, ):
const EmployeeTable = props => { const { children, rest } = useOverrides(props, overrides, defaultProps);
:
const EmployeeTable = props => { const { override, rest } = useOverrides(props, overrides, defaultProps);
- useState, :
const [employees, setEmployees] = useState([]);
- useEffect, API Airtable setEmployees.
, . fetch URL , ?view=All%20employees. headers API , 3 , 4.
useEffect(() => { fetch("https://api.airtable.com/v0/appWw7KBKSc9bPjZE/Employee%20directory?view=All%20employees", { headers: { 'Authorization': 'Bearer YOUR_API_KEY' } }) .then(response => response.json()) .then(data => setEmployees(data.records.map(({ fields }) => fields))); }, []);
- , props override. , .
:
return <Stack {...rest}> {children} </Stack>; };
:
return <Stack {...rest}> { employees.map(employee => <EmployeeCard {...override("employeeCard")} employee={employee} />) } </Stack>; };
- Ctrl + S ( Cmd + S Mac). :
import React, { useEffect, useState } from "react"; import { useOverrides, Stack } from "@quarkly/components"; import EmployeeCard from "./EmployeeCard"; const defaultProps = { "margin-top": "40px" }; const overrides = {}; const EmployeeTable = props => { const { override, rest } = useOverrides(props, overrides, defaultProps); const [employees, setEmployees] = useState([]); useEffect(() => { fetch("https://api.airtable.com/v0/appWw7KBKSc9bPjZE/Employee%20directory?view=All%20employees", { headers: { 'Authorization': 'Bearer YOUR_API_KEY' } }) .then(response => response.json()) .then(data => setEmployees(data.records.map(({ fields }) => fields))); }, []); return <Stack {...rest}> { employees.map(employee => <EmployeeCard {...override("employeeCard")} employee={employee} />) } </Stack>; }; Object.assign(EmployeeTable, { ...Stack, defaultProps, overrides }); export default EmployeeTable;
: API YOUR_API_KEY.
! Airtable, employees map. employees <EmployeeCard/>, .
EmpolyeeCard .
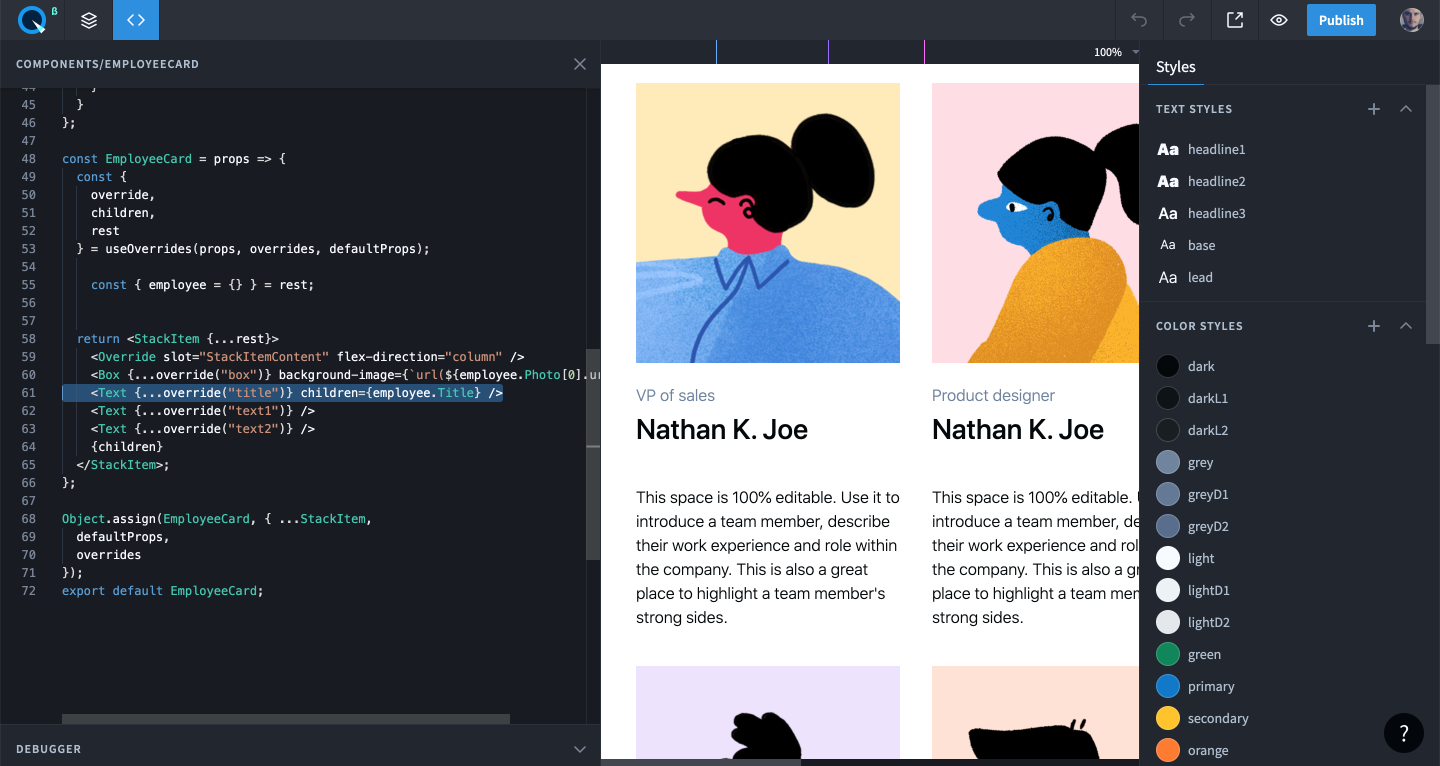
5. EmpolyeeCard
.
- . Components, EmployeeCard, <>.
- :
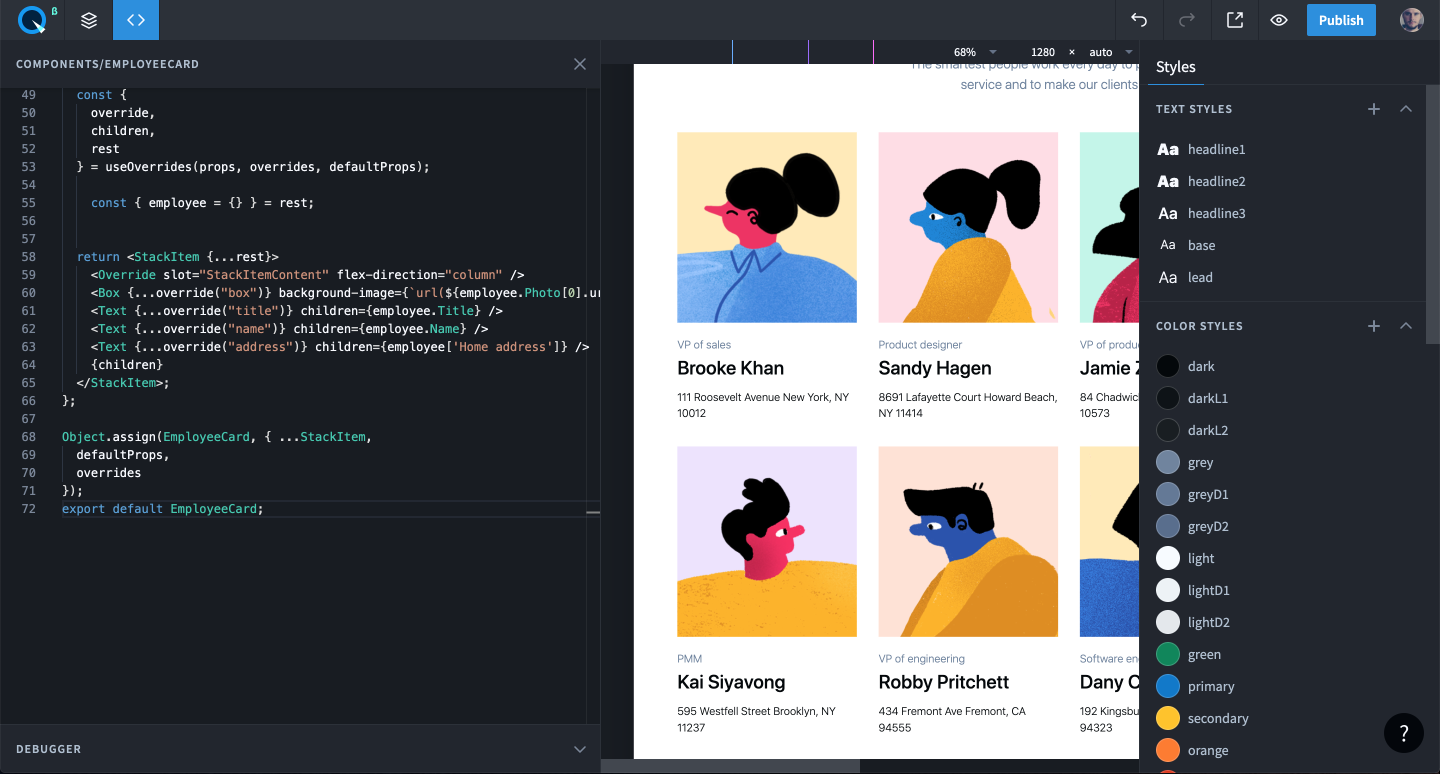
import React from "react"; import { useOverrides, Override, StackItem } from "@quarkly/components"; import { Box, Text } from "@quarkly/widgets"; const defaultProps = { "width": "25%", "lg-width": "50%", "sm-width": "100%" }; const overrides = { "box": { "kind": "Box", "props": { "height": "0", "margin": "0 0 20px 0", "padding-bottom": "100%", "background": "url(https://images.unsplash.com/photo-1503443207922-dff7d543fd0e?ixlib=rb-1.2.1&ixid=eyJhcHBfaWQiOjEyMDd9&auto=format&fit=crop&w=582&q=80) 50% 0/cover no-repeat" } }, "text": { "kind": "Text", "props": { "color": "--grey", "margin": "0", "children": "CEO" } }, "text1": { "kind": "Text", "props": { "as": "h3", "font": "--headline3", "margin": "5px 0 20px 0", "children": "Nathan K. Joe" } }, "text2": { "kind": "Text", "props": { "as": "p", "margin": "20px 0 5px 0", "children": "This space is 100% editable. Use it to introduce a team member, describe their work experience and role within the company. This is also a great place to highlight a team member's strong sides." } } }; const EmployeeCard = props => { const { override, children, rest } = useOverrides(props, overrides, defaultProps); return <StackItem {...rest}> <Override slot="StackItemContent" flex-direction="column" /> <Box {...override("box")} /> <Text {...override("text")} /> <Text {...override("text1")} /> <Text {...override("text2")} /> {children} </StackItem>; }; Object.assign(EmployeeCard, { ...StackItem, defaultProps, overrides }); export default EmployeeCard;
- :
} = useOverrides(props, overrides, defaultProps);
:
const { employee = {} } = rest;
employee . - , , . :
<Box {...override("box")} />
:
<Box {...override("box")} background-image={`url(${employee.Photo && employee.Photo[0] && employee.Photo[0].url})`}/>
:
"background": "url(https://images.unsplash.com/photo-1503443207922-dff7d543fd0e?ixlib=rb-1.2.1&ixid=eyJhcHBfaWQiOjEyMDd9&auto=format&fit=crop&w=582&q=80) 50% 0/cover no-repeat"
:
"background-size": "cover", "background-position": "center", "background-image": "url(https://images.unsplash.com/photo-1503443207922-dff7d543fd0e?ixlib=rb-1.2.1&ixid=eyJhcHBfaWQiOjEyMDd9&auto=format&fit=crop&w=582&q=80) 50% 0/cover no-repeat"
:

- , . API Airtable . https://airtable.com/api, .
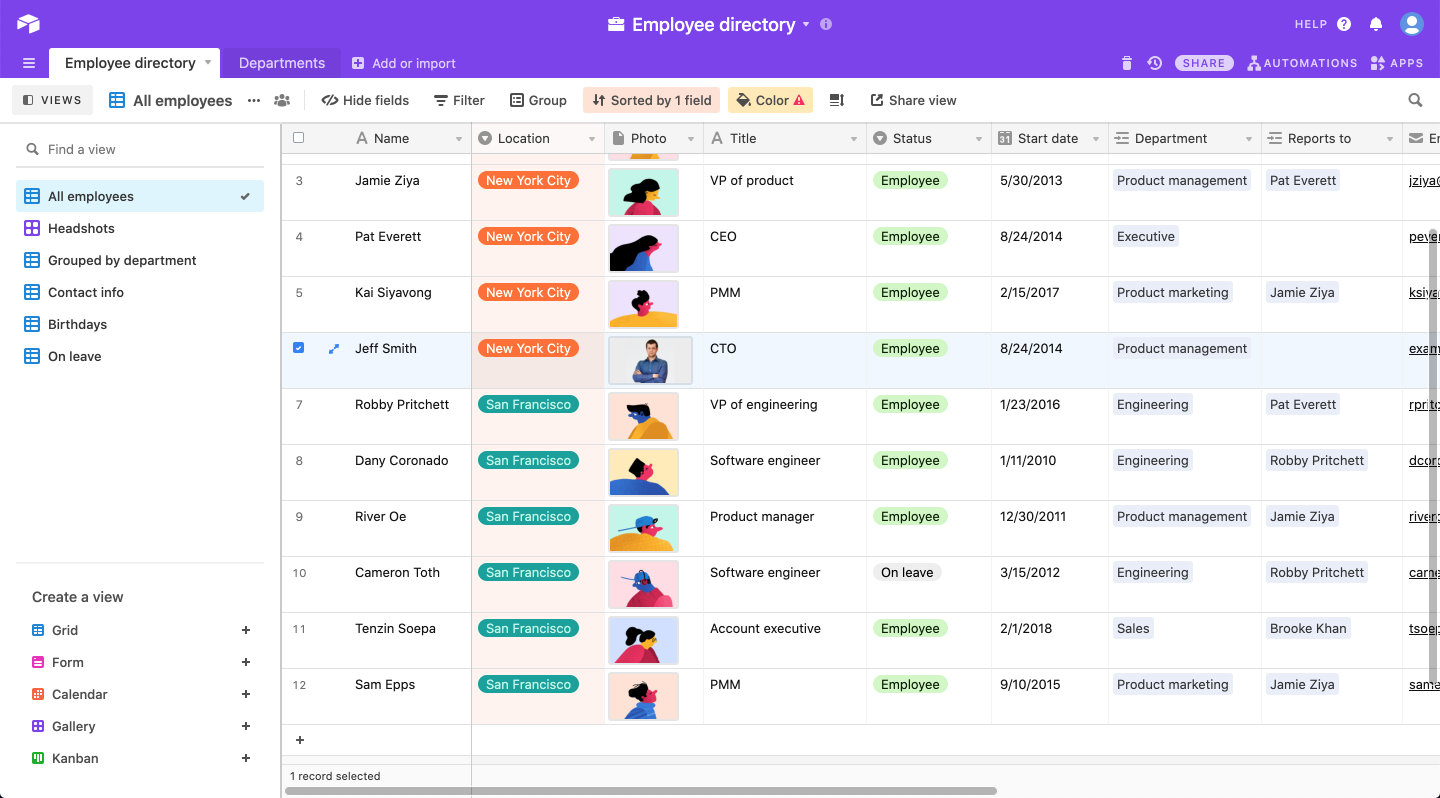
EMPLOYEE DIRECTORY TABLE.
, :
Name
Department
Home address
Email address
DOB
Start date
Phone
Reports to
Title
Status
Photo
Location - Title. :
<Text {...override("text")} />
:
<Text {...override("title")} children={employee.Title} />
overrides , .
:
"text": { "kind": "Text", "props": { "color": "--grey", "margin": "0", "children": "CEO" } },
:
"title": { "kind": "Text", "props": { "color": "--grey", "margin": "0", "children": "Title" } },
:
: . - Name Home address.
:
<Text {...override("text1")} /> <Text {...override("text2")} />
:
<Text {...override("name")} children={employee.Name} /> <Text {...override("address")} children={employee['Home address']} />
overrides. :
"text1": { "kind": "Text", "props": { "as": "h3", "font": "--headline3", "margin": "5px 0 20px 0", "children": "Nathan K. Joe" } }, "text2": { "kind": "Text", "props": { "as": "p", "margin": "20px 0 5px 0", "children": "This space is 100% editable. Use it to introduce a team member, describe their work experience and role within the company. This is also a great place to highlight a team member's strong sides." } }
:
"name": { "kind": "Text", "props": { "as": "h3", "font": "--headline3", "margin": "5px 0 5px 0", "children": "Name" } }, "address": { "kind": "Text", "props": { "as": "p", "margin": "10px 0 5px 0", "children": "Home address" } },
:
- Text . Department Reports to, DEPARTMENTS TABLE.
:
<Text {...override("address")} children={employee['Home address']} /> <Text {...override("Start date")} children={`Start date: ${employee['Start date']}`} /> <Text {...override("Status")} children={employee['Status']} /> <Text {...override("DOB")} children={`Birth date: ${employee['DOB']}`} />
"address": { "kind": "Text", "props": { "as": "p", "margin": "10px 0 5px 0", "children": "Home address" } }, "Start date": { "kind": "Text", "props": { "as": "p", "margin": "10px 0 5px 0", "children": "Start date" } }, "Status": { "kind": "Text", "props": { "as": "p", "margin": "10px 0 5px 0", "children": "Status" } }, "DOB": { "kind": "Text", "props": { "as": "p", "margin": "10px 0 5px 0", "children": "Birth date" } },
:
- Ahora agreguemos dos componentes de Enlace , en los que tendremos Teléfono y Correo electrónico :
import { Box, Text } from "@quarkly/widgets";
cambiar a:
import { Box, Text, Link } from "@quarkly/widgets";
Y agregue las siguientes líneas:
<Link {...override("Email address")} children={employee['Email address']} href={`mailto:${employee['Email address']}`} /> <Link {...override("Phone")} children={employee['Phone']} href={`tel:${employee['Phone']}`}/>
Sin olvidar sus anulaciones :
"Email address": { "kind": "Link", "props": { "margin": "10px 0 5px 0", "color": "--primary", "text-decoration": "none", "children": "Email" } }, "Phone": { "kind": "Link", "props": { "margin": "10px 0 5px 0", "color": "--primary", "text-decoration": "none", "children": "Phone" } },
Comprobando el resultado:

Nuestro código final se ve así:
import React from "react";
import { useOverrides, Override, StackItem } from "@quarkly/components";
import { Box, Text, Link } from "@quarkly/widgets";
const defaultProps = {
"width": "25%",
"lg-width": "50%",
"sm-width": "100%"
};
const overrides = {
"box": {
"kind": "Box",
"props": {
"height": "0",
"margin": "0 0 20px 0",
"padding-bottom": "100%",
"background-size": "cover",
"background-position": "center",
"background-image": "url(https://images.unsplash.com/photo-1503443207922-dff7d543fd0e?ixlib=rb-1.2.1&ixid=eyJhcHBfaWQiOjEyMDd9&auto=format&fit=crop&w=582&q=80) 50% 0/cover no-repeat"
}
},
"title": {
"kind": "Text",
"props": {
"color": "--grey",
"margin": "0",
"children": "title"
}
},
"name": {
"kind": "Text",
"props": {
"as": "h3",
"font": "--headline3",
"margin": "5px 0 5px 0",
"children": "Name"
}
},
"address": {
"kind": "Text",
"props": {
"as": "p",
"margin": "10px 0 5px 0",
"children": "Home address"
}
},
"Start date": {
"kind": "Text",
"props": {
"as": "p",
"margin": "10px 0 5px 0",
"children": "Start date"
}
},
"Status": {
"kind": "Text",
"props": {
"as": "p",
"margin": "10px 0 5px 0",
"children": "Status"
}
},
"DOB": {
"kind": "Text",
"props": {
"as": "p",
"margin": "10px 0 5px 0",
"children": "Birth date"
}
},
"Email address": {
"kind": "Link",
"props": {
"margin": "10px 0 5px 0",
"color": "--primary",
"text-decoration": "none",
"children": "Email"
}
},
"Phone": {
"kind": "Link",
"props": {
"margin": "10px 0 5px 0",
"color": "--primary",
"text-decoration": "none",
"children": "Phone"
}
},
};
const EmployeeCard = props => {
const {
override,
children,
rest
} = useOverrides(props, overrides, defaultProps);
const { employee = {} } = rest;
return <StackItem {...rest}>
<Override slot="StackItemContent" flex-direction="column" />
<Box {...override("box")} background-image={`url(${employee.Photo[0].url})`}/>
<Text {...override("title")} children={employee.Title} />
<Text {...override("name")} children={employee.Name} />
<Text {...override("address")} children={employee['Home address']} />
<Text {...override("Start date")} children={`Start date: ${employee['Start date']}`} />
<Text {...override("Status")} children={employee['Status']} />
<Text {...override("DOB")} children={`Birth date: ${employee['DOB']}`} />
<Link {...override("Email address")} children={employee['Email address']} href={`mailto:${employee['Email address']}`} />
<Link {...override("Phone")} children={employee['Phone']} href={`tel:${employee['Phone']}`}/>
{children}
</StackItem>;
};
Object.assign(EmployeeCard, { ...StackItem,
defaultProps,
overrides
});
export default EmployeeCard;
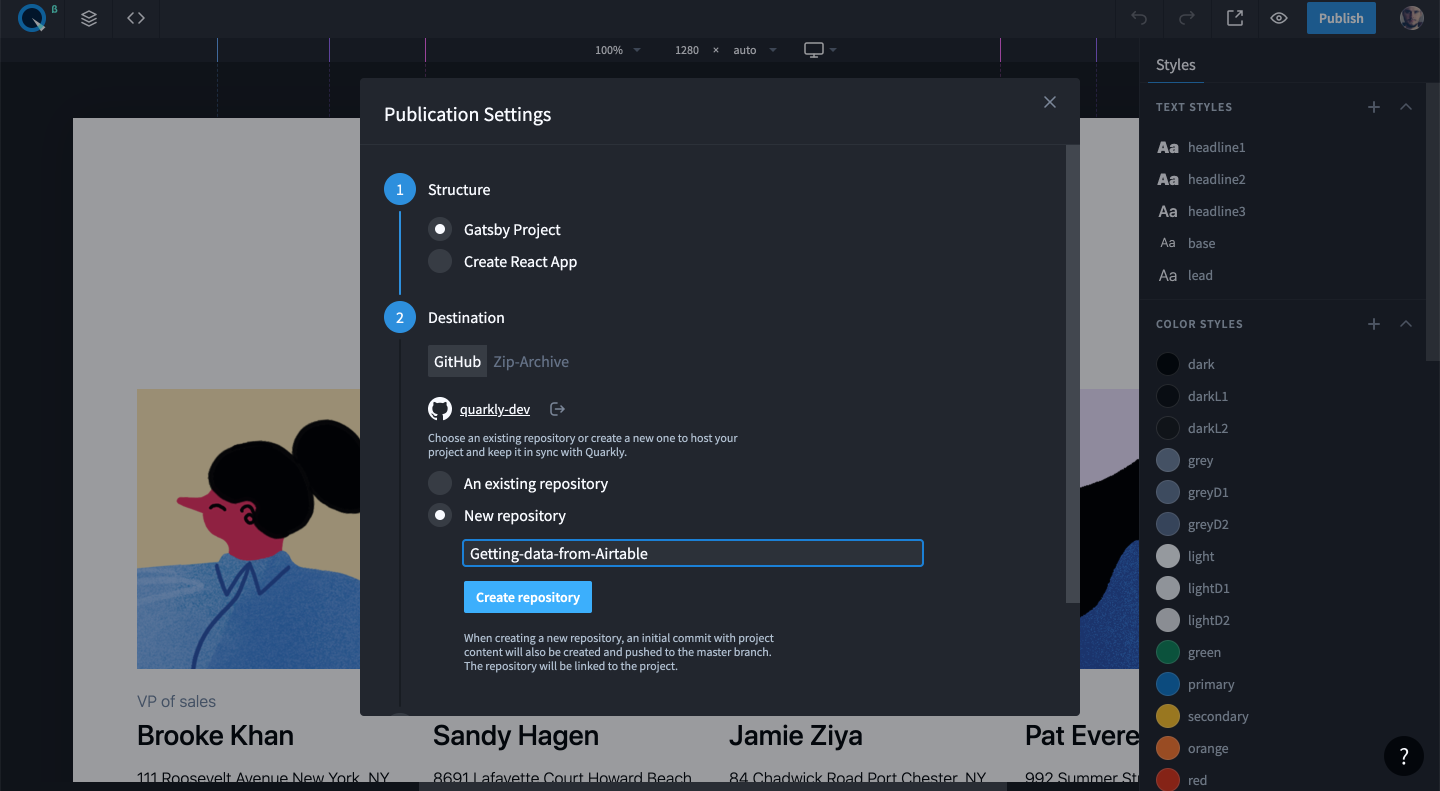
Nos comprometemos con GitHub y publicamos en Netlify:

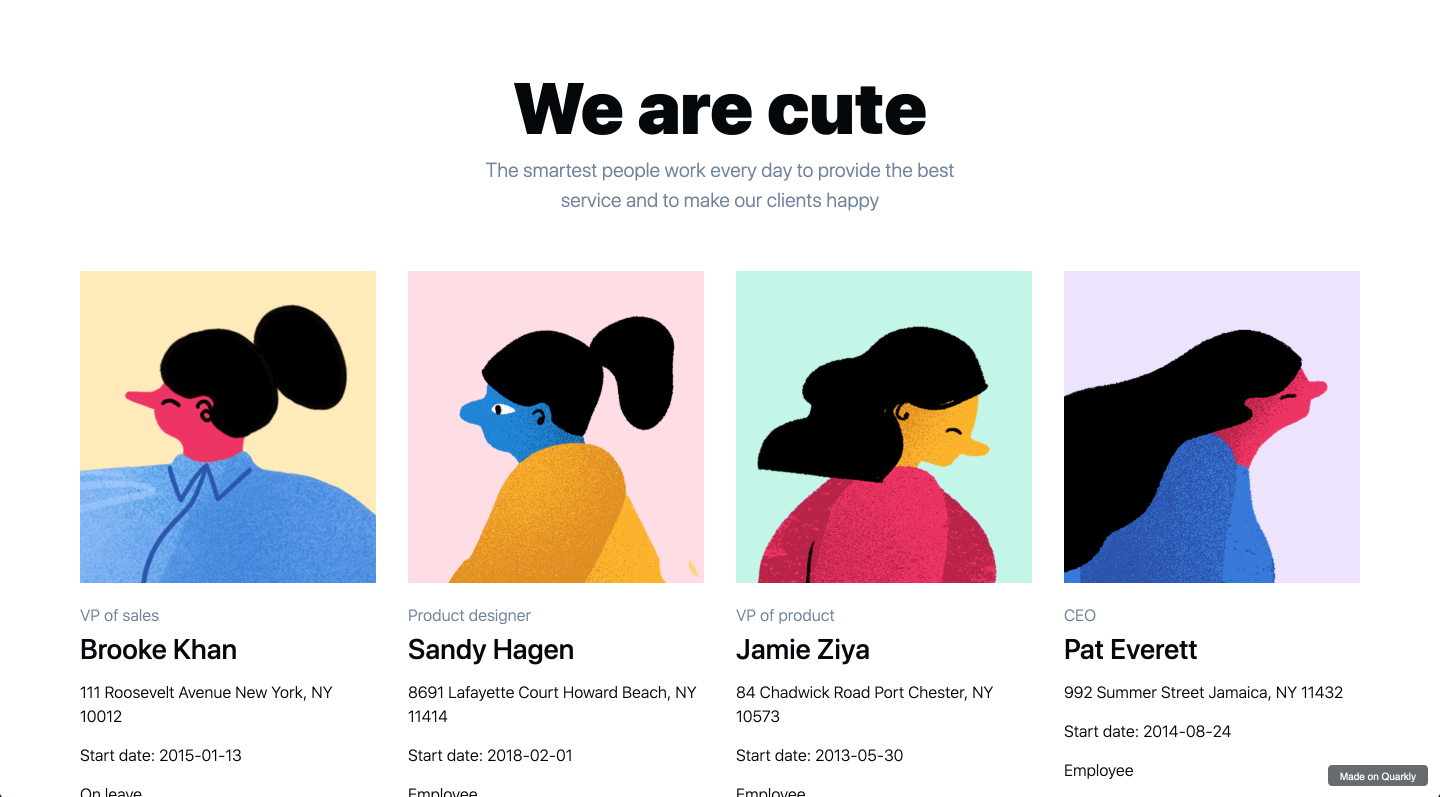
Esperamos unos minutos y comprobamos: https://keen-varahamihira-c54ae1.netlify.app/
Para verificar la sincronización, cambie los datos en la base de datos:
Ahora aparecerán en la aplicación:

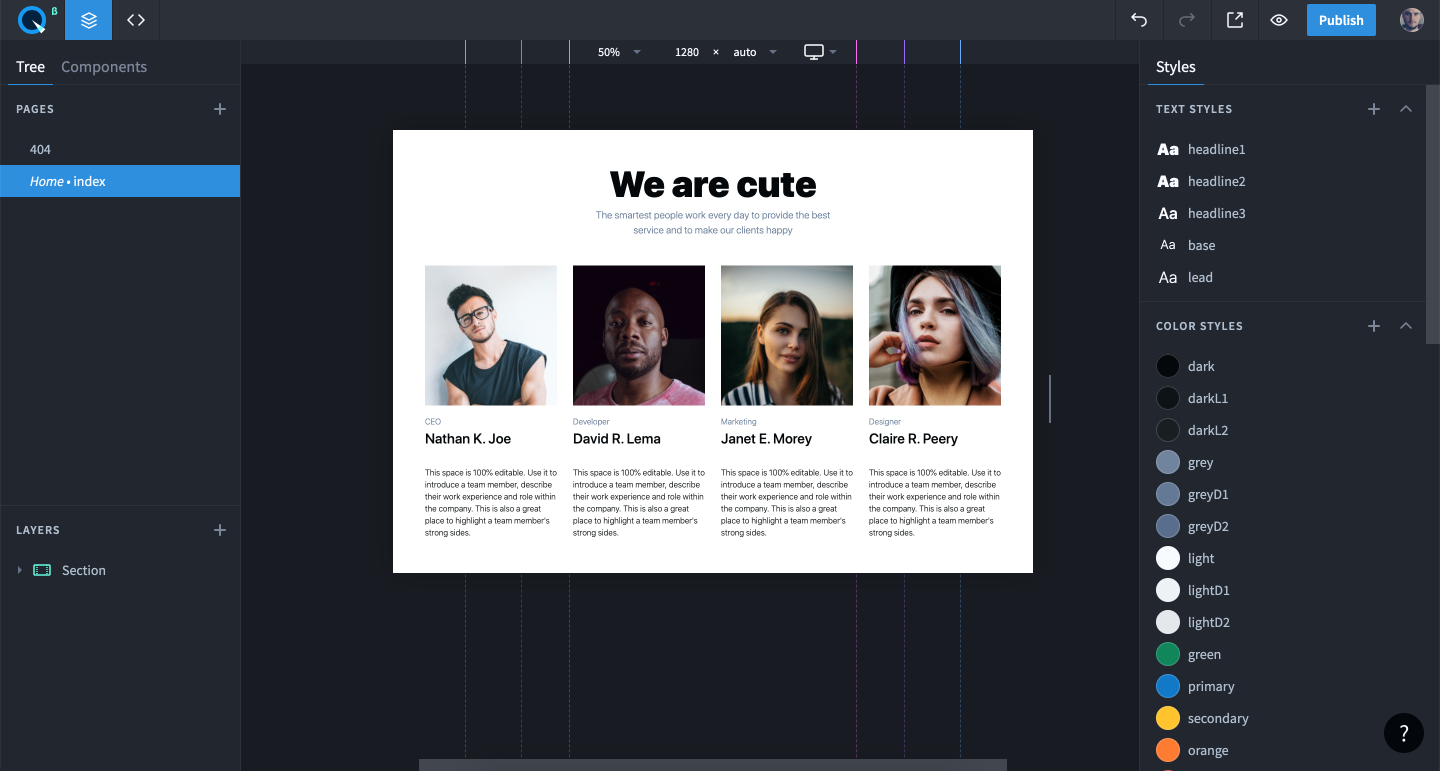
En el futuro, podemos diseñar nuestros elementos con tarjetas como queramos sin romper la importación configurada de Airtable. Aquí se puede ver un ejemplo .
Repositorio de GitHub: https://github.com/quarkly-dev/Getting-data-from-Airtable-tutorial
¡Gracias por su atención!
— . , , .