Hola, Habr.
Una vez encontré una descripción de una aplicación de Android que determinaba la frecuencia cardíaca con la cámara del teléfono, solo con la imagen general. La cámara no se aplicó al dedo, no fue iluminada por el LED. Un punto interesante fue que los revisores no creían en la posibilidad de tal determinación del pulso y la solicitud fue rechazada. No sé cómo terminó el autor del programa, pero resultó interesante comprobar si esto era posible.
Para aquellos que estén interesados en lo sucedido, la continuación bajo el corte.
Por supuesto, no haré una aplicación para Android, es mucho más fácil probar la idea en Python.
Recibimos datos de la cámara
Primero, necesitamos obtener la transmisión desde la cámara web, para lo cual usaremos OpenCV. El código es multiplataforma y puede ejecutarse tanto en Windows como en Linux / OSX.
import cv2
import io
import time
cap = cv2.VideoCapture(0)
cap.set(cv2.CAP_PROP_FRAME_WIDTH, 1920)
cap.set(cv2.CAP_PROP_FRAME_HEIGHT, 1080)
cap.set(cv2.CAP_PROP_FPS, 30)
while(True):
ret, frame = cap.read()
# Our operations on the frame come here
img = cv2.cvtColor(frame, cv2.COLOR_BGR2GRAY)
# Display the frame
cv2.imshow('Crop', crop_img)
if cv2.waitKey(1) & 0xFF == ord('q'):
break
cap.release()
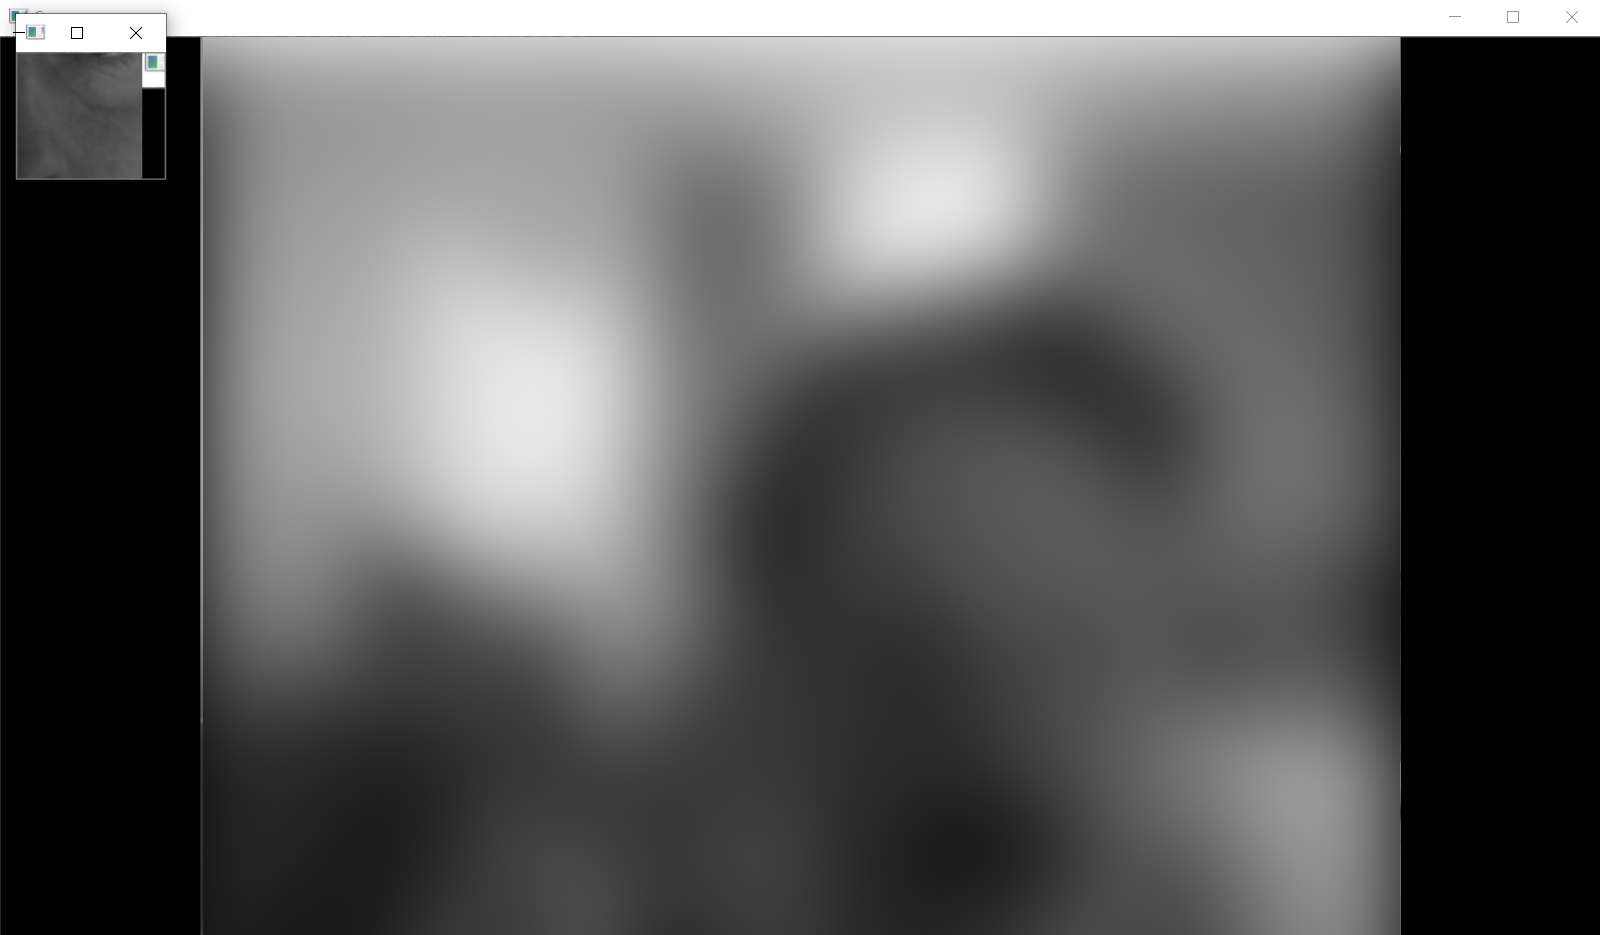
cv2.destroyAllWindows()La idea de determinar el pulso es que el tono de la piel cambia ligeramente debido al flujo sanguíneo en los vasos, por lo que necesitamos un recorte de la imagen, que contendrá solo un fragmento de piel.
x, y, w, h = 800, 500, 100, 100
crop_img = img[y:y + h, x:x + w]

cv2.imshow('Crop', crop_img)
Si todo se hizo correctamente, al iniciar el programa deberíamos sacar algo como esto de la cámara (borroso por motivos de privacidad) y recortar:
Tratamiento
, , . .
heartbeat_count = 128
heartbeat_values = [0]*heartbeat_count
heartbeat_times = [time.time()]*heartbeat_count

while True:
    ...
    # Update the list
    heartbeat_values = heartbeat_values[1:] + [np.average(crop_img)]
    heartbeat_times = heartbeat_times[1:] + [time.time()]
numpy.average , , .
:
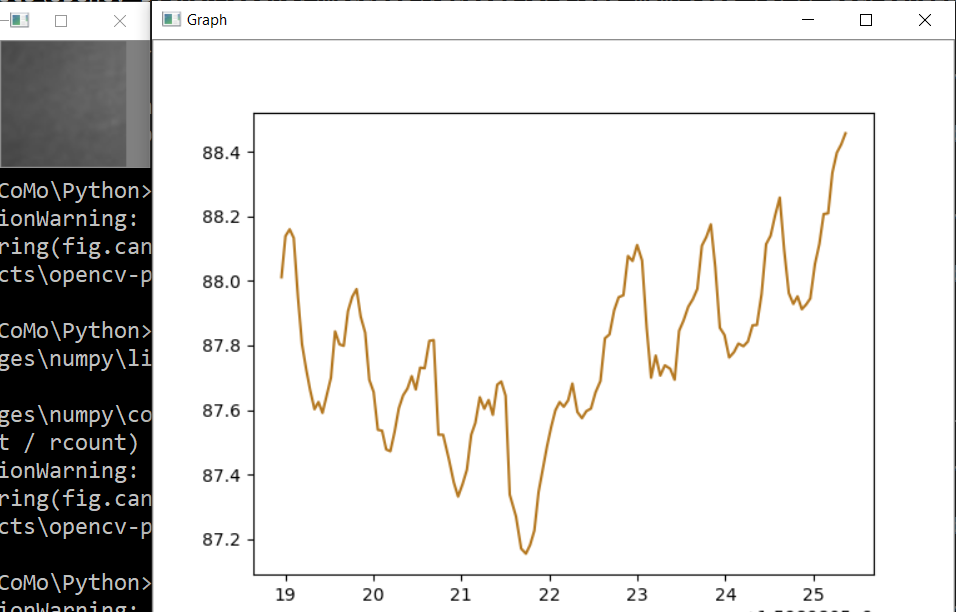
fig = plt.figure()
ax = fig.add_subplot(111)
while(True):
    ...

    ax.plot(heartbeat_times, heartbeat_values)
    fig.canvas.draw()
    plot_img_np = np.fromstring(fig.canvas.tostring_rgb(), dtype=np.uint8, sep='')
    plot_img_np = plot_img_np.reshape(fig.canvas.get_width_height()[::-1] + (3,))
    plt.cla()

    cv2.imshow('Graph', plot_img_np)
: OpenCV numpy, matplotlib , numpy.fromstring.
.
, , , " ", - . - !
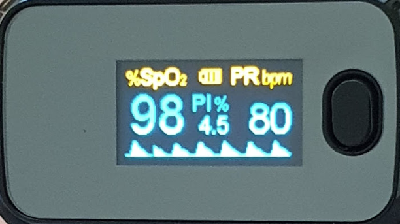
, , , . , ! , 0.5% , " ", . , , 75bpm. , :
, .. , , .
, . , . , , OpenCV . , .
, - , ? , . cap = cv2.VideoCapture(0) cap = cv2.VideoCapture("video.mp4"), .
, .
Spoiler
import numpy as np
from matplotlib import pyplot as plt
import cv2
import io
import time

# Camera stream
cap = cv2.VideoCapture(0)
cap.set(cv2.CAP_PROP_FRAME_WIDTH, 1920)
cap.set(cv2.CAP_PROP_FRAME_HEIGHT, 1280)
cap.set(cv2.CAP_PROP_FPS, 30)
# Video stream (optional)
# cap = cv2.VideoCapture("videoplayback.mp4")

# Image crop
x, y, w, h = 800, 500, 100, 100
heartbeat_count = 128
heartbeat_values = [0]*heartbeat_count
heartbeat_times = [time.time()]*heartbeat_count

# Matplotlib graph surface
fig = plt.figure()
ax = fig.add_subplot(111)

while(True):
    # Capture frame-by-frame
    ret, frame = cap.read()

    # Our operations on the frame come here
    img = cv2.cvtColor(frame, cv2.COLOR_BGR2GRAY)
    crop_img = img[y:y + h, x:x + w]

    # Update the data
    heartbeat_values = heartbeat_values[1:] + [np.average(crop_img)]
    heartbeat_times = heartbeat_times[1:] + [time.time()]

    # Draw matplotlib graph to numpy array
    ax.plot(heartbeat_times, heartbeat_values)
    fig.canvas.draw()
    plot_img_np = np.fromstring(fig.canvas.tostring_rgb(), dtype=np.uint8, sep='')
    plot_img_np = plot_img_np.reshape(fig.canvas.get_width_height()[::-1] + (3,))
    plt.cla()

    # Display the frames
    cv2.imshow('Crop', crop_img)
    cv2.imshow('Graph', plot_img_np)
    if cv2.waitKey(1) & 0xFF == ord('q'):
        break

cap.release()
cv2.destroyAllWindows()
Y como de costumbre, todos los experimentos exitosos