¡Hola, Habr! Esta vez intenté hacer un chat simple a través de Websockets. Para más detalles, bienvenido bajo cat.
Contenido
- Aprendiendo Scala: Parte 1 - Juego de serpientes
- Aprendiendo Scala: Parte 2 - Hoja de tareas con subidas de imágenes
- Learning Scala: Parte 3 - Pruebas unitarias
- Aprendiendo Scala: Parte 4 - WebSocket
Enlaces
- Códigos fuente
- Imágenes de docker
- Tapir
- Http4s
- Fs2
- Doobie
- ScalaTest
- ScalaCheck
- ScalaTestPlusScalaCheck
En realidad, todo el código está en un objeto ChatHub
class ChatHub[F[_]] private(
                             val topic: Topic[F, WebSocketFrame],
                             private val ref: Ref[F, Int]
                           )
                           (
                             implicit concurrent: Concurrent[F],
                             timer: Timer[F]
                           ) extends Http4sDsl[F] {

  val endpointWs: ServerEndpoint[String, Unit, String, Stream[IO, WebSocketFrame], IO] = endpoint
    .get
    .in("chat")
    .tag("WebSockets")
    .summary("   .    : ws://localhost:8080/chat")
    .description("   ")
    .in(
      stringBody
        .description("      ")
        .example("!")
    )
    .out(
      stringBody
        .description("  -   ")
        .example("6 :     Id  f518a53d: !")
    )
    //    .
    .serverLogic(_ => IO(Left(()): Either[Unit, String]))

  def routeWs: HttpRoutes[F] = {
    HttpRoutes.of[F] {
      case GET -> Root / "chat" => logic()
    }
  }

  private def logic(): F[Response[F]] = {
    val toClient: Stream[F, WebSocketFrame] =
      topic.subscribe(1000)
    val fromClient: Pipe[F, WebSocketFrame, Unit] =
      handle
    WebSocketBuilder[F].build(toClient, fromClient)
  }

  private def handle(s: Stream[F, WebSocketFrame]): Stream[F, Unit] = s
    .collect({
      case WebSocketFrame.Text(text, _) => text
    })
    .evalMap(text => ref.modify(count => (count + 1, WebSocketFrame.Text(s"${count + 1} : $text"))))
    .through(topic.publish)
}

object ChatHub {

  def apply[F[_]]()(implicit concurrent: Concurrent[F], timer: Timer[F]): F[ChatHub[F]] = for {
    ref <- Ref.of[F, Int](0)
    topic <- Topic[F, WebSocketFrame](WebSocketFrame.Text("==="))
  } yield new ChatHub(topic, ref)
}
Aquí debe decir inmediatamente acerca de Topic, una primitiva de sincronización de Fs2 que le permite hacer un modelo de Publicador - Suscriptor, y puede tener muchos Publicadores y muchos Suscriptores al mismo tiempo. En general, es mejor enviarle mensajes a través de algún tipo de búfer como Queue porque tiene un límite en la cantidad de mensajes en la cola y Publisher espera hasta que todos los Suscriptores reciban mensajes en su cola de mensajes y si se desborda puede colgarse.
val topic: Topic[F, WebSocketFrame],
Aquí también cuento el número de mensajes que se enviaron al chat como el número de cada mensaje. Como necesito hacer esto desde diferentes hilos, utilicé un análogo de Atomic, que se llama Ref aquí y garantiza la atomicidad de la operación.
private val ref: Ref[F, Int]
Procesando un flujo de mensajes de los usuarios.
  private def handle(stream: Stream[F, WebSocketFrame]): Stream[F, Unit] =
    stream
//       .
    .collect({
      case WebSocketFrame.Text(text, _) => text
    })
//               .
    .evalMap(text => ref.modify(count => (count + 1, WebSocketFrame.Text(s"${count + 1} : $text"))))
//
    .through(topic.publish)
En realidad, la lógica misma de crear un socket.
private def logic(): F[Response[F]] = {
//    .
    val toClient: Stream[F, WebSocketFrame] =
//
      topic.subscribe(1000)
//
    val fromClient: Pipe[F, WebSocketFrame, Unit] =
//
      handle
//         .
    WebSocketBuilder[F].build(toClient, fromClient)
  }
Vinculamos nuestro socket a la ruta en el servidor (ws: // localhost: 8080 / chat)
def routeWs: HttpRoutes[F] = {
    HttpRoutes.of[F] {
      case GET -> Root / "chat" => logic()
    }
  }
De hecho, eso es todo. Entonces puede iniciar el servidor con esta ruta. Todavía quería hacer cualquier tipo de documentación. En general, para documentar WebSocket y otras interacciones basadas en eventos como RabbitMQ AMPQ, existe AsynAPI, pero no hay nada debajo de Tapir, así que acabo de hacer una descripción del punto final para Swagger como una solicitud GET. Por supuesto, no funcionará. Más precisamente, se devolverá un error 501, pero se mostrará en Swagger
  val endpointWs: Endpoint[String, Unit, String, fs2.Stream[F, Byte]] = endpoint
    .get
    .in("chat")
    .tag("WebSockets")
    .summary("   .    : ws://localhost:8080/chat")
    .description("   ")
    .in(
      stringBody
        .description("      ")
        .example("!")
    )
    .out(
      stringBody
        .description("  -   ")
        .example("6 :     Id  f518a53d: !")
    )
En el propio swagger, se ve así: conecta

nuestro chat a nuestro servidor API
    todosController = new TodosController()
    imagesController = new ImagesController()
//
    chatHub <- Resource.liftF(ChatHub[IO]())
    endpoints = todosController.endpoints ::: imagesController.endpoints
//     Swagger
    docs = (chatHub.endpointWs :: endpoints).toOpenAPI("The Scala Todo List", "0.0.1")
    yml: String = docs.toYaml
//
    routes = chatHub.routeWs <+>
      endpoints.toRoutes <+>
      new SwaggerHttp4s(yml, "swagger").routes[IO]
    httpApp = Router(
      "/" -> routes
    ).orNotFound
    blazeServer <- BlazeServerBuilder[IO](serverEc)
      .bindHttp(settings.host.port, settings.host.host)
      .withHttpApp(httpApp)
      .resource
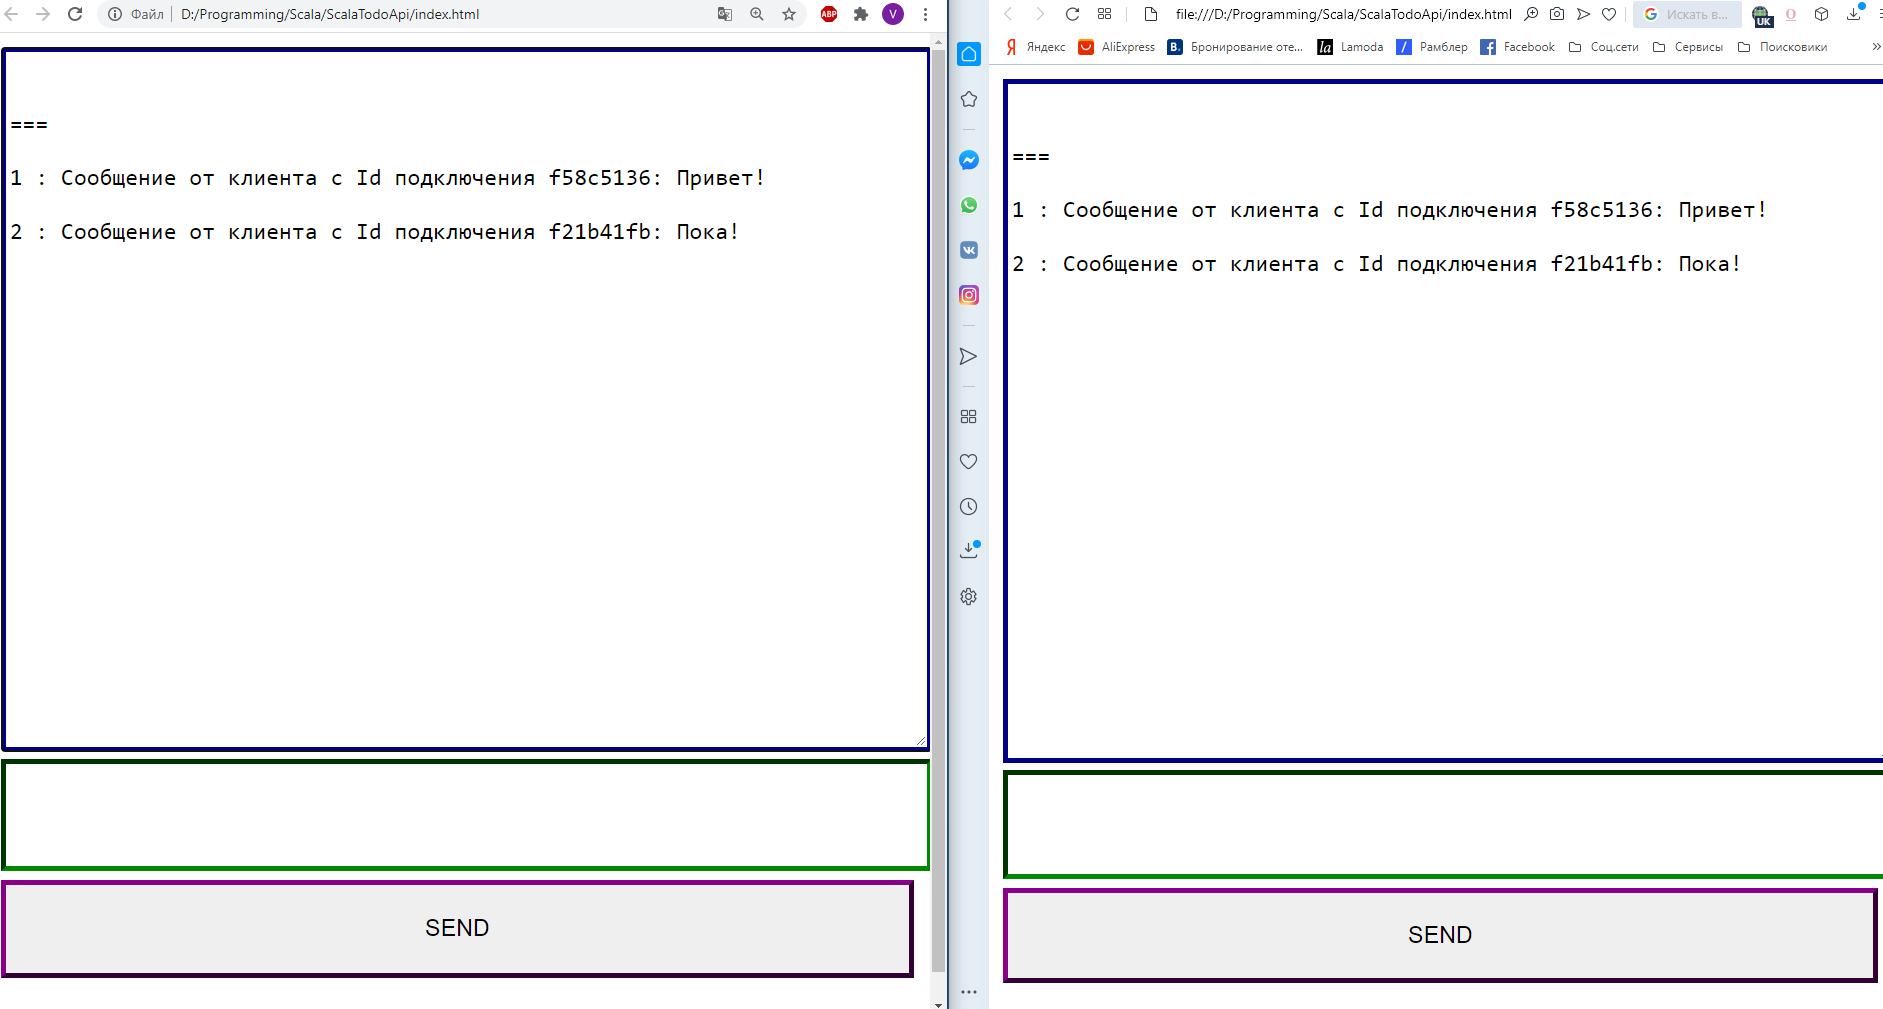
Nos conectamos al chat con un script sumamente sencillo.
    <script>
        const id = `f${(~~(Math.random() * 1e8)).toString(16)}`;
        const webSocket = new WebSocket('ws://localhost:8080/chat');

        webSocket.onopen = event => {
            alert('onopen ');
        };

        webSocket.onmessage = event => {
            console.log(event);
            receive(event.data);
        };

        webSocket.onclose = event => {
            alert('onclose ');
        };

        function send() {
            let text = document.getElementById("message");
            webSocket.send(`    Id  ${id}: ${text.value}`);
            text.value = '';
        }

        function receive(m) {
            let text = document.getElementById("chat");
            text.value = text.value + '\n\r' + m;
        }
    </script>
En realidad esto es todo. Espero que alguien que también estudie la roca encuentre este artículo interesante y quizás incluso útil.