Nuestra tarea fue implementar un creador de sitios web. En el frente, todo lo ejecuta una aplicación React que, en función de las acciones del usuario, genera JSON con información sobre cómo construir HTML y lo almacena en el backend de PHP. En lugar de duplicar la lógica de ensamblaje HTML en el backend, decidimos reutilizar el código JS. Obviamente, esto simplificará el mantenimiento, ya que el código solo cambiará en un lugar por una persona. Aquí, Server Side Rendering viene al rescate junto con el motor V8 y la extensión PHP V8JS.
En este artículo, cubriremos cómo usamos los V8J para nuestra tarea específica, pero los casos de uso no se limitan a eso. La más obvia es la capacidad de utilizar la representación del lado del servidor para abordar sus necesidades de SEO.
Configurar
Usamos Symfony y Docker, por lo que el primer paso es inicializar un proyecto vacío y configurar el entorno. Notemos los puntos principales:
- La extensión V8Js debe instalarse en el Dockerfile:
...
RUN apt-get install -y software-properties-common
RUN add-apt-repository ppa:stesie/libv8 && apt-get update
RUN apt-get install -y libv8-7.5 libv8-7.5-dev g++ expect
RUN git clone https://github.com/phpv8/v8js.git /usr/local/src/v8js && \
   cd /usr/local/src/v8js && phpize && ./configure --with-v8js=/opt/libv8-7.5 && \
   export NO_INTERACTION=1 && make all -j4 && make test install

RUN echo extension=v8js.so > /etc/php/7.2/fpm/conf.d/99-v8js.ini
RUN echo extension=v8js.so > /etc/php/7.2/cli/conf.d/99-v8js.ini
...
- Instalar React y ReactDOM de la forma más sencilla
- Agregar ruta de índice y controlador predeterminado:
<?php
declare(strict_types=1);

namespace App\Controller;

use Symfony\Bundle\FrameworkBundle\Controller\AbstractController;
use Symfony\Component\HttpFoundation\Response;
use Symfony\Component\Routing\Annotation\Route;

final class DefaultController extends AbstractController
{
   /**
    * @Route(path="/")
    */
   public function index(): Response
   {
       return $this->render('index.html.twig');
   }
}
- Agregue la plantilla index.html.twig con React incluido
<html>
<body>
    <div id="app"></div>
    <script src="{{ asset('assets/react.js') }}"></script>
    <script src="{{ asset('assets/react-dom.js') }}"></script>
    <script src="{{ asset('assets/babel.js') }}"></script>
    <script type="text/babel" src="{{ asset('assets/front.jsx') }}"></script>
</body>
</html>
Utilizando
Para demostrar V8, creemos un script de renderizado H1 y P simple con texto assets / front.jsx:
'use strict';

class DataItem extends React.Component {
   constructor(props) {
       super(props);

       this.state = {
           checked: props.name,
           names: ['h1', 'p']
       };

       this.change = this.change.bind(this);
       this.changeText = this.changeText.bind(this);
   }

   render() {
       return (
           <li>
               <select value={this.state.checked} onChange={this.change} >
                   {
                       this.state.names.map((name, k) => {
                           return (
                               <option key={k} value={name}>{name}</option>
                           );
                       })
                   }
               </select>
               <input type='text' value={this.state.value} onChange={this.changeText} />
           </li>
       );
   }

   change(e) {
       let newval = e.target.value;
       if (this.props.onChange) {
           this.props.onChange(this.props.number, newval)
       }
       this.setState({checked: newval});
   }

   changeText(e) {
       let newval = e.target.value;
       if (this.props.onChangeText) {
           this.props.onChangeText(this.props.number, newval)
       }
   }
}

class DataList extends React.Component {
   constructor(props) {
       super(props);
       this.state = {
           message: null,
           items: []
       };

       this.add = this.add.bind(this);
       this.save = this.save.bind(this);
       this.updateItem = this.updateItem.bind(this);
       this.updateItemText = this.updateItemText.bind(this);
   }

   render() {
       return (
           <div>
               {this.state.message ? this.state.message : ''}
               <ul>
                   {
                       this.state.items.map((item, i) => {
                           return (
                               <DataItem
                                   key={i}
                                   number={i}
                                   value={item.name}
                                   onChange={this.updateItem}
                                   onChangeText={this.updateItemText}
                               />
                           );
                       })
                   }
               </ul>
               <button onClick={this.add}></button>
               <button onClick={this.save}></button>
           </div>
       );
   }

   add() {
       let items = this.state.items;
       items.push({
           name: 'h1',
           value: ''
       });

       this.setState({message: null, items: items});
   }

   save() {
       fetch(
           '/save',
           {
               method: 'POST',
               headers: {
                   'Content-Type': 'application/json;charset=utf-8'
               },
               body: JSON.stringify({
                   items: this.state.items
               })
           }
       ).then(r => r.json()).then(r => {
           this.setState({
               message: r.id,
               items: []
           })
       });
   }

   updateItem(k, v) {
       let items = this.state.items;
       items[k].name = v;

       this.setState({items: items});
   }

   updateItemText(k, v) {
       let items = this.state.items;
       items[k].value = v;

       this.setState({items: items});
   }
}

const domContainer = document.querySelector('#app');
ReactDOM.render(React.createElement(DataList), domContainer);
Vaya a localhost: 8088 (8088 se especifica en docker-compose.yml como puerto nginx):

- DB
create table data(
   id serial not null primary key,
   data json not null
);
- Ruta
/**
* @Route(path="/save")
*/
public function save(Request $request): Response
{
   $em = $this->getDoctrine()->getManager();

   $data = (new Data())->setData(json_decode($request->getContent(), true));
   $em->persist($data);
   $em->flush();

   return new JsonResponse(['id' => $data->getId()]);
}
Presionamos el botón guardar, cuando hacemos clic en nuestra ruta, se envía JSON:
{
  "items":[
     {
        "name":"h1",
        "value":" "
     },
     {
        "name":"p",
        "value":" "
     },
     {
        "name":"h1",
        "value":"  "
     },
     {
        "name":"p",
        "value":"   "
     }
  ]
}
En respuesta, se devuelve el identificador del registro en la base de datos:
/**
* @Route(path="/save")
*/
public function save(Request $request): Response
{
   $em = $this->getDoctrine()->getManager();

   $data = (new Data())->setData(json_decode($request->getContent(), true));
   $em->persist($data);
   $em->flush();

   return new JsonResponse(['id' => $data->getId()]);
}
Ahora que tiene algunos datos de prueba, puede probar el V8 en acción. Para hacer esto, necesitará esbozar un script de React que formará componentes a partir de los accesorios de Dom pasados. Pongámoslo junto a otros activos y llamémoslo ssr.js:
'use strict';

class Render extends React.Component {
   constructor(props) {
       super(props);
   }

   render() {
       return React.createElement(
           'div',
           {},
           this.props.items.map((item, k) => {
               return React.createElement(item.name, {}, item.value);
           })
       );
   }
}
Para formar una cadena a partir del árbol DOM generado, usaremos el componente ReactDomServer (https://unpkg.com/browse/react-dom@16.13.0/umd/react-dom-server.browser.production.min.js). Escribamos una ruta con HTML listo:
/**
* @Route(path="/publish/{id}")
*/
public function renderPage(int $id): Response
{
   $data = $this->getDoctrine()->getManager()->find(Data::class, $id);

   if (!$data) {
       return new Response('<h1>Page not found</h1>', Response::HTTP_NOT_FOUND);
   }

   $engine = new \V8Js();

   ob_start();
   $engine->executeString($this->createJsString($data));

   return new Response(ob_get_clean());
}

private function createJsString(Data $data): string
{
   $props = json_encode($data->getData());
   $bundle = $this->getRenderString();

   return <<<JS
var global = global || this, self = self || this, window = window || this;
$bundle;
print(ReactDOMServer.renderToString(React.createElement(Render, $props)));
JS;
}

private function getRenderString(): string
{
   return
       sprintf(
           "%s\n%s\n%s\n%s",
           file_get_contents($this->reactPath, true),
           file_get_contents($this->domPath, true),
           file_get_contents($this->domServerPath, true),
           file_get_contents($this->ssrPath, true)
       );
}
Aquí:
- reactPath - ruta a react.js
- domPath: ruta a react-dom.js
- domServerPath: ruta a react-dom-server.js
- ssrPath: la ruta a nuestro script ssr.js
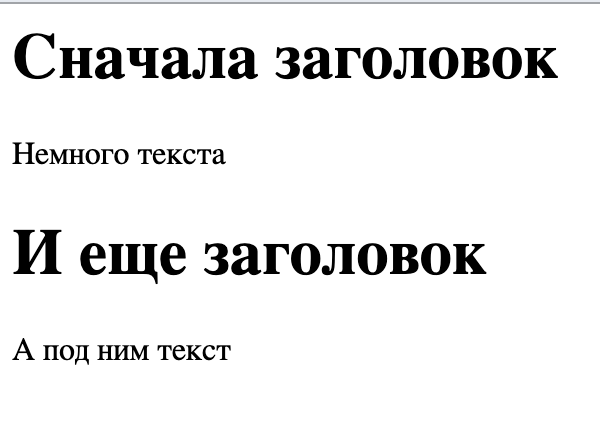
Siga el enlace / publicar / 3:

Como puede ver, todo se renderizó exactamente como lo necesitamos.
Conclusión
En conclusión, me gustaría decir que la representación del lado del servidor no es tan difícil y puede ser muy útil. Lo único que vale la pena agregar aquí es que el renderizado puede llevar bastante tiempo, y es mejor agregar una cola aquí: RabbitMQ o Gearman.
El código fuente de PPS se puede ver aquí https://github.com/damir-in/ssr-php-symfony
Autores
damir_in zinvapel